Note: This post may contain affiliate links. That means if you click on a link and make a purchase, we may receive a small commission. Thank you for supporting our content!
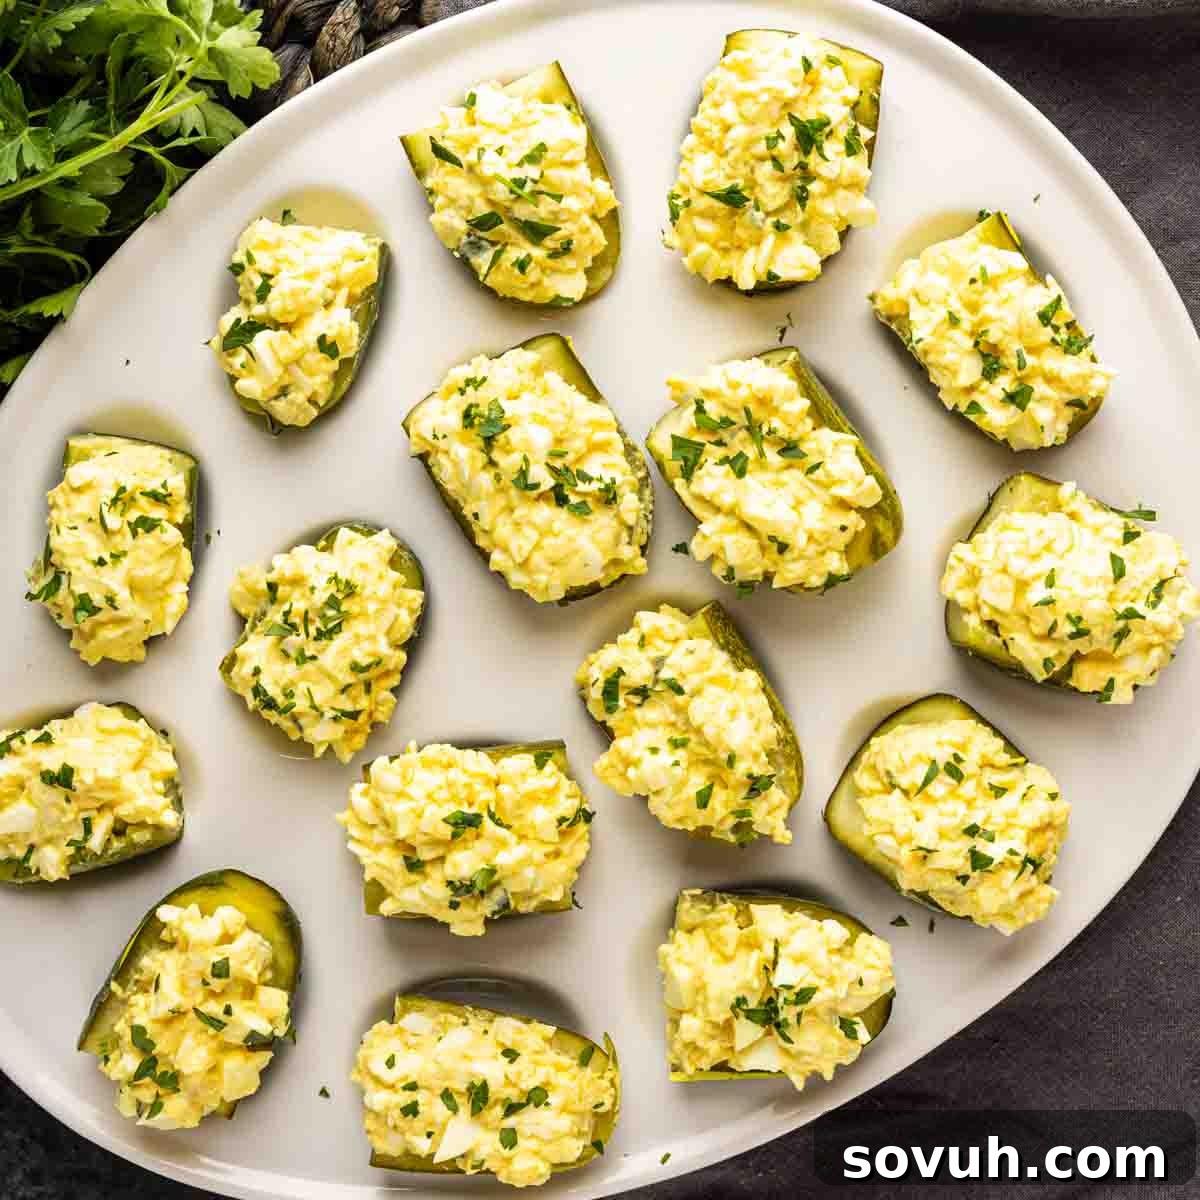
Prepare to impress your guests with the ultimate party finger food: Deviled Pickles! These irresistible dill pickle bites are a delightful fusion of two classic appetizers, offering a creamy, tangy, and utterly addictive experience. Filled with a savory egg salad, they present an easy, low-carb solution for any gathering. Whether you’re planning for holidays, summer cookouts, or a lively game day spread, these make-ahead appetizers are guaranteed to be the first to disappear from the platter. They are not just a snack; they are a conversation starter, bringing a fresh, retro twist to your culinary repertoire.
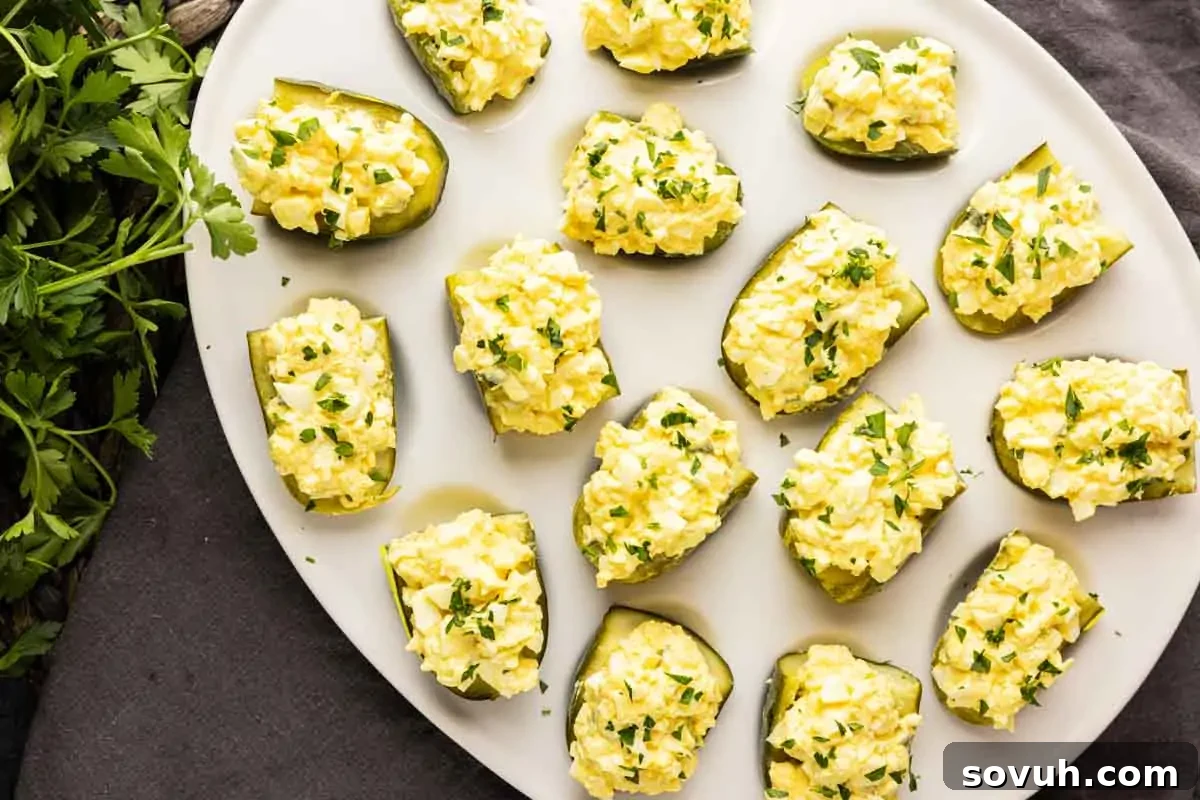
Introducing the Deviled Pickles: A Classic Reimagined
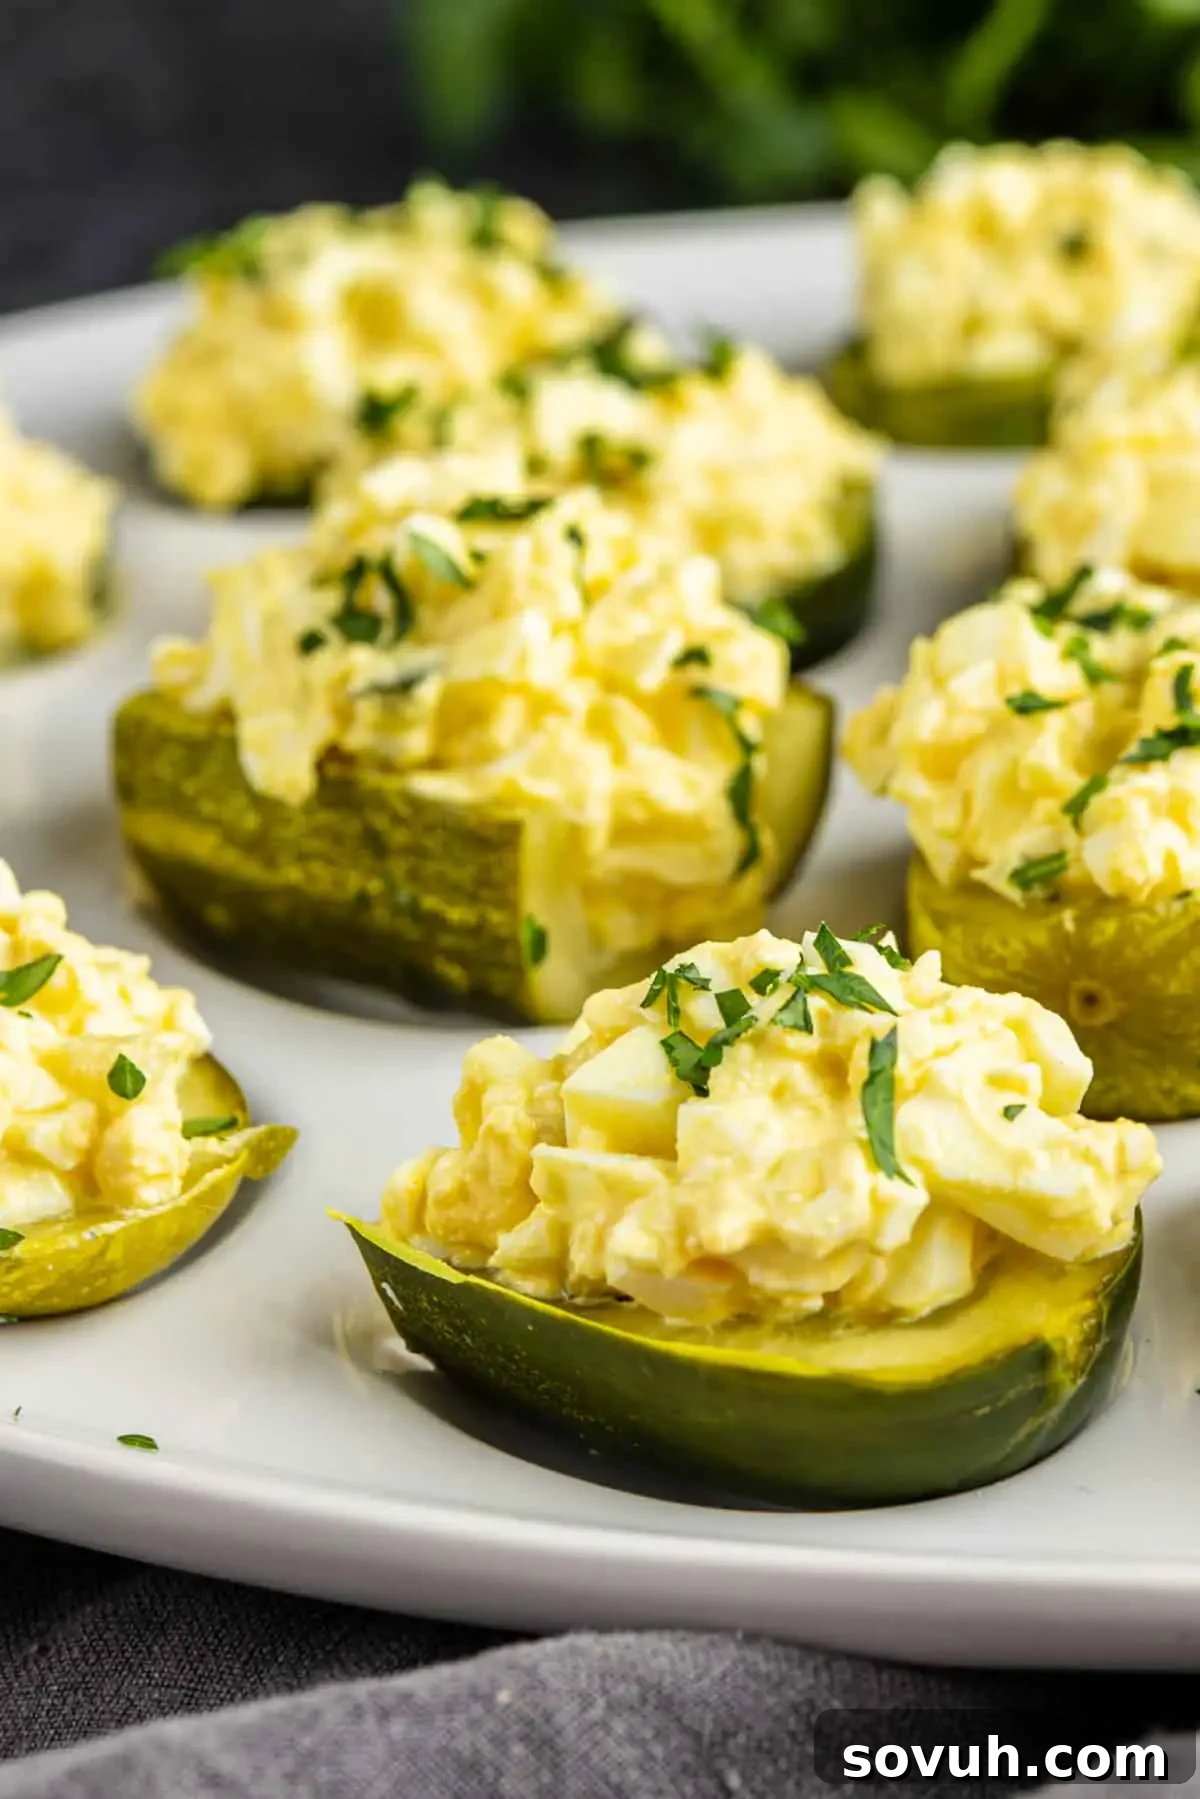
This deviled pickle recipe masterfully combines the beloved flavors of traditional deviled eggs with the satisfying crunch and vibrant tang of dill pickles. Instead of meticulously piping a creamy, savory filling back into delicate egg whites, this innovative approach utilizes crisp pickle halves as the perfect vessel for a rich egg salad mixture. The result is a truly unique and incredibly easy pickle appetizer that stands out on any spread.
If you’re constantly seeking simple pickle appetizers or exciting party finger foods that cater to diverse tastes, look no further. This recipe checks all the essential boxes: it’s wonderfully creamy without feeling heavy, perfectly tangy without being overwhelmingly sharp, and straightforward enough for even the most novice cooks to master. There’s also a charmingly retro appeal to these deviled pickle bites, evoking a sense of nostalgic comfort food while offering a surprisingly modern twist. This makes them a fantastic conversation starter and a memorable addition to any appetizer tray.
Beyond their inherent deliciousness, these dill pickle bites are remarkably flexible, allowing for personalization to suit your preferences. Feel free to experiment with garnishes – a sprinkle of vibrant paprika for color, fresh chives for a mild oniony zest, or even a dash of cayenne for a subtle kick. The filling itself can also be customized; swap classic yellow mustard for a more robust Dijon, or adjust the chop of your eggs and pickles to create a chunkier, more textural salad or a smoother, more spreadable consistency. This adaptability ensures that your Deviled Pickles will always be a perfect fit for your gathering and your personal style.
Essential Ingredients for Perfect Deviled Pickles
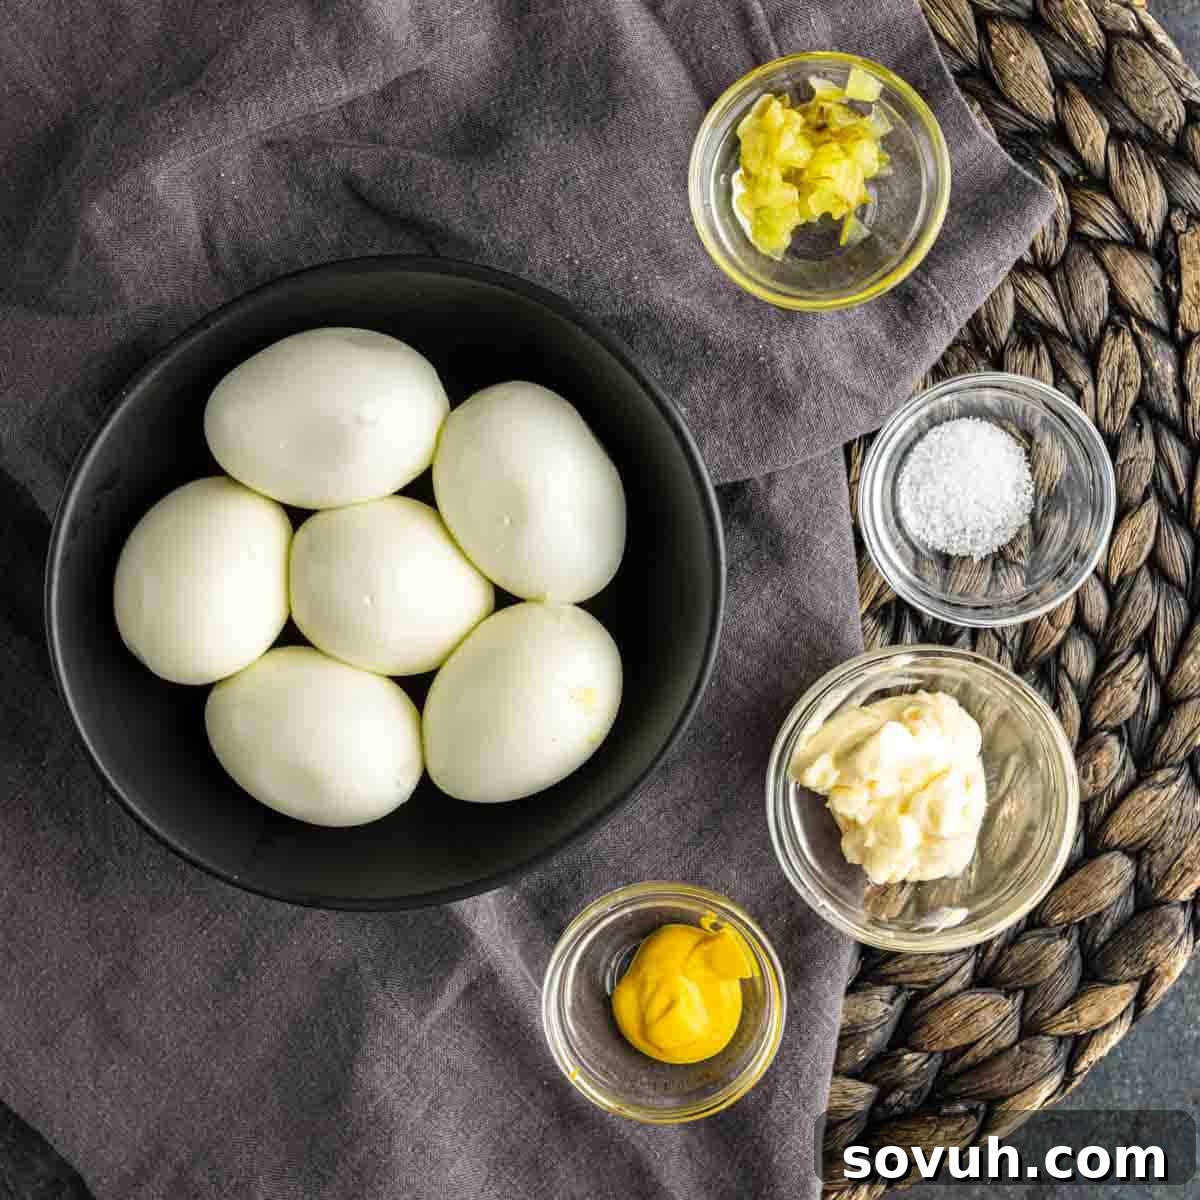
Crafting these delectable deviled pickle bites requires a handful of simple, readily available ingredients. The magic happens when these components come together to create a harmonious blend of flavors and textures.
- Hard-Boiled Eggs: These form the rich, creamy, and satisfying base of your filling. Unlike traditional deviled eggs which often rely solely on mashed yolks, this recipe uses the entire finely chopped egg, creating a more substantial and luxurious egg salad-like texture. For ultimate convenience, consider using pre-cooked, peeled hard-boiled eggs from your local grocery store to save time.
- Mayonnaise: The essential binding agent, mayonnaise brings all the filling ingredients together, imparting that quintessential creamy consistency and classic deviled flavor. If you’re looking to lighten the dish slightly or prefer an extra touch of tang, you can substitute a portion of the mayonnaise with plain Greek yogurt. Be mindful that this will alter the flavor profile to be a bit sharper.
- Mustard: A crucial ingredient for balance, mustard adds a lively “zip” that cuts through the richness of the eggs and mayonnaise. Classic yellow mustard delivers that familiar, comforting deviled egg taste, while a sophisticated Dijon mustard offers a bolder, more complex, and slightly spicier kick, elevating the appetizer for a more “grown-up” palate.
- Salt: A mere pinch of salt is all it takes to awaken and enhance all the other flavors. Given that pickles are naturally briny and salty, it’s wise to start with a minimal amount and taste your filling before adding more. You can always add, but you can’t take away!
- Whole Dill Pickles: These are the stars of the show, acting as the edible “shell” that cradles your flavorful filling, effectively replacing the egg whites found in a conventional deviled egg recipe. The key here is to select firm, crisp dill pickles. Their robust texture is vital for them to hold their shape and provide that satisfying crunch with every bite. Avoid softer varieties, as they may become soggy and fail to hold the filling adequately.
- Paprika (Optional Garnish): A light dusting of paprika on top of the finished deviled pickles serves a dual purpose. It adds a beautiful pop of reddish-orange color, making the appetizer visually appealing, and delivers that classic deviled look that guests instantly recognize and appreciate. Both sweet and smoked paprika work wonderfully, depending on your desired flavor.
- Chives (Optional Garnish): For an extra touch of freshness and a hint of mild oniony flavor, chopped fresh chives make an excellent garnish. They not only contribute to the taste but also make the deviled pickle bites look incredibly polished and professional, perfect for an elegant presentation.
Step-by-Step Guide to Crafting Deviled Pickles
Making these delightful deviled pickle appetizers is surprisingly simple. Follow these clear instructions to create a crowd-pleasing snack that’s big on flavor and low on fuss.
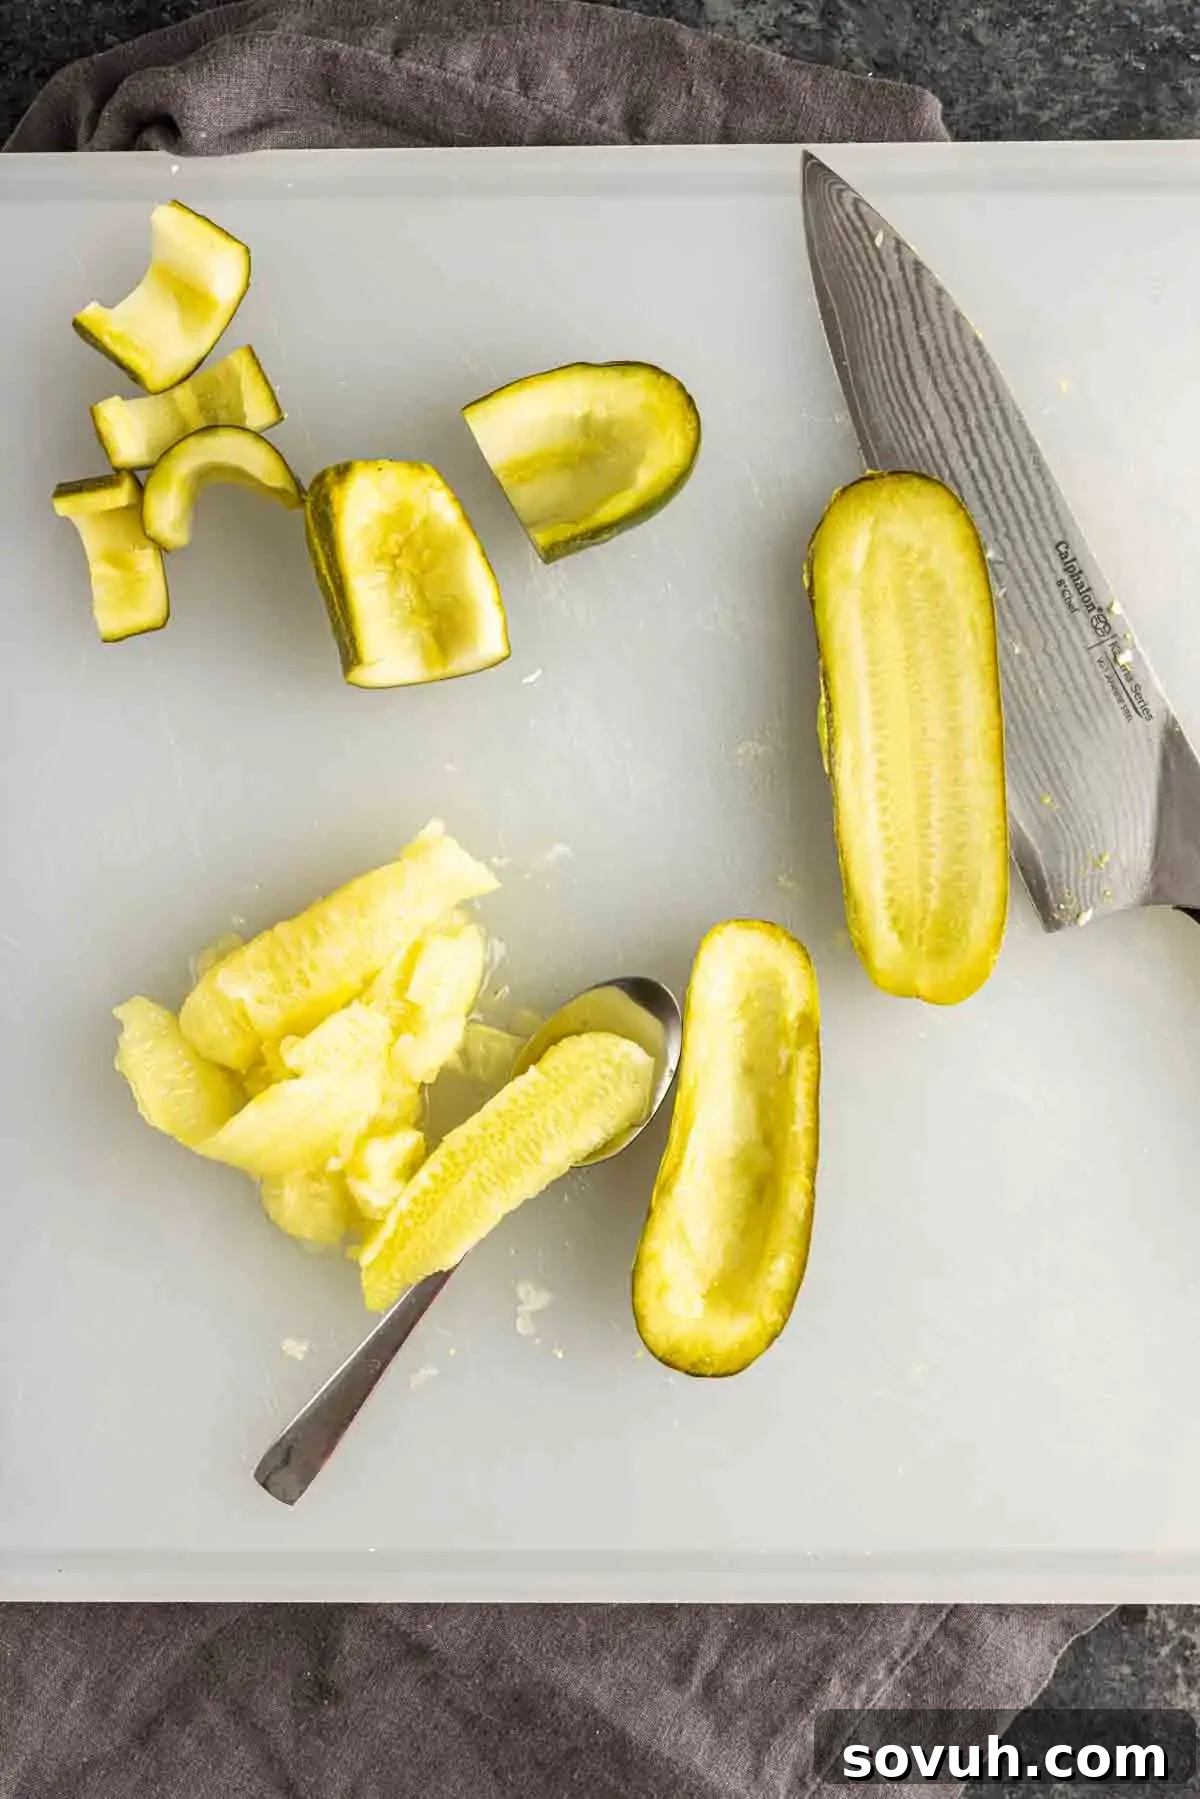
- Prepare the Pickle Halves: Begin by taking your whole dill pickles and carefully slicing them in half lengthwise. If you’re using pickles that are already halved, you can skip this initial cut. Next, using a small spoon (a melon baller or even a teaspoon works well), gently scrape out the soft interior flesh and seeds from each pickle half. The goal is to create a neat, shallow well that can hold the filling without compromising the pickle’s structural integrity. Be careful not to scrape too deeply, as you want the pickle to remain sturdy enough to handle. Once scooped, you can cut each long pickle half into two shorter pieces, creating more manageable, bite-sized “boats.”
- Chop the Pickle Centers: Do not discard the pickle insides you just removed! Finely chop these tender bits. These small pieces will be incorporated into your egg filling, adding an extra layer of briny flavor and a wonderful textural crunch. Set them aside in a small bowl for later.
- Chop the Eggs: Take your peeled hard-boiled eggs and finely chop them. For a filling with a noticeable texture and satisfying bite, use a sharp knife. If you prefer a smoother, more homogeneous mixture reminiscent of traditional deviled egg filling, you can mash the eggs thoroughly with a fork. Place the chopped eggs in a medium-sized mixing bowl.
- Create the Creamy Filling: To the bowl containing the chopped eggs, add the mayonnaise, the finely chopped dill pickle pieces you set aside, the mustard of your choice, and a pinch of salt. Using a spoon or fork, mash and stir all the ingredients together until they are thoroughly combined and well-blended. The resulting mixture should be creamy, easily spreadable, but still possess a pleasing, slight texture from the chopped eggs and pickles. Taste and adjust seasoning as needed, remembering that pickles already contribute significant saltiness.
- Fill the Pickles: Now for the fun part! Spoon the prepared creamy egg mixture generously into each hollowed-out pickle half. You can opt for a casual, rustic look by simply spooning the filling, or for a more elegant and dramatic presentation, mound the filling higher, creating a fuller, more impressive bite. A piping bag with a wide tip can also be used for a professional finish.
- Garnish and Serve: For an extra flourish, consider garnishing your deviled pickles. Sprinkle the tops with a tiny bit of sweet paprika for color, and/or a scattering of fresh chopped chives for a fresh, aromatic finish. These deviled pickle bites are absolutely delicious served immediately, but for optimal flavor integration and a firmer texture, chilling them in the refrigerator for at least 20-30 minutes before serving is highly recommended. Enjoy!
Expert Tips & Tricks for Perfect Deviled Pickles
While this deviled pickle recipe is celebrated for its simplicity, a few clever techniques can elevate your appetizer from good to absolutely outstanding, ensuring every bite is a memorable one.
- Choose Firm Pickles: The foundation of a great deviled pickle is a robust pickle. Soft or mushy pickles simply won’t hold the filling effectively and will detract from the overall experience. Always seek out crisp, firm dill pickles with a sturdy texture. These will ensure your dill pickle bites maintain their neat appearance and are easy for guests to pick up and enjoy without falling apart.
- Thoroughly Dry the Pickle Halves: After you’ve scooped out the centers of your pickle halves, it’s a critical step to pat the inside of each one thoroughly with a paper towel. Pickles inherently contain a lot of moisture, and failing to dry them can lead to a watery filling, diluting the flavors and compromising the texture. Drying them ensures the filling stays creamy and delicious, resulting in a more balanced and enjoyable appetizer.
- Chop Everything Finely: Given that these are intended as bite-sized appetizers, the size of your chop matters significantly. Finely chopped pieces of both hard-boiled egg and the reserved pickle insides will create a filling that is not only easier to spoon neatly into the pickle boats but also much easier and more pleasant to eat in a single bite. Aim for small, consistent pieces for the best results.
- Taste Before Adding More Salt: Exercise caution when adding salt. Remember that dill pickles themselves are quite salty, and mustard also contributes a briny, tangy element. Adding too much extra salt can quickly overwhelm the delicate balance of flavors. Start with a tiny pinch, mix well, and then taste. You can always add a bit more if needed, but you can’t remove it once it’s in.
- Chill Before Serving: While freshly made deviled pickles are undeniably delicious, they truly shine after a brief chill in the refrigerator. Allowing them to rest for at least 20 to 30 minutes (or even longer) helps all the individual flavors meld and deepen, transforming them into a more cohesive and classic deviled filling experience. The cold also enhances the crispness of the pickle, providing a refreshing contrast.
- Utilize a Piping Bag for a Polished Presentation: If you’re aiming for a more elegant and professional party presentation, a simple trick is to spoon your creamy filling into a zip-top bag. Snip off one corner of the bag with scissors, and then use it as an impromptu piping bag to neatly pipe the egg mixture into the pickle halves. This quick and easy upgrade makes your deviled pickles look incredibly polished and uniform without requiring much extra effort.
- Customize Filling Texture: The beauty of this recipe lies in its adaptability to personal preference. Some people adore a chunky, rustic egg salad-style filling, where they can distinctly feel the pieces of egg and pickle. Others prefer a smoother, more uniform texture, akin to the filling of traditional deviled eggs. Both approaches work perfectly here. Simply adjust how much you mash the eggs and mix the filling – mash more for a smoother result, less for a delightful chunky texture.
Why You’ll Fall in Love with This Deviled Pickle Recipe
In a world overflowing with appetizer recipes, this Deviled Pickles creation stands head and shoulders above the rest for several compelling reasons. It’s more than just a snack; it’s an experience that brings joy and ease to any occasion.
First and foremost, it’s incredibly fun and wonderfully unexpected. Deviled Pickles aren’t your everyday appetizer, and that element of surprise makes them an instant hit at any gathering. Picture the delight on your guests’ faces as they encounter these intriguing bites on your platter – they’ll be curious, captivated, and eager to discover what hidden deliciousness awaits. They spark conversation and create a memorable culinary moment.
Secondly, their ease of preparation is a major draw. There’s virtually no cooking involved beyond the initial step of boiling the eggs, which can even be done well in advance or outsourced by purchasing pre-cooked eggs. The remaining steps are straightforward: simply chopping, mixing, and filling. This means less time in the kitchen stressing over complicated dishes and more time enjoying the company of your guests. It’s a truly stress-free appetizer solution.
Thirdly, these little wonders are absolutely bursting with flavor. The harmonious marriage of the rich, creamy, and savory egg mixture with the bright, briny, and crisp pickle shell creates a sensational flavor explosion in every single bite. The tangy notes from the pickle perfectly cut through the richness of the egg salad, leaving your palate refreshed and eager for more. It’s a perfectly balanced symphony of textures and tastes.
And finally, their practicality is unmatched, especially for busy hosts. Deviled Pickles make for a fantastic make-ahead appetizer, ideal for holidays, potlucks, picnics, tailgating events, and game day gatherings. You have the flexibility to prepare all the components – the eggs, the chopped pickles, and the mixed filling – ahead of time. Then, simply assemble them closer to serving time for maximum freshness and crispness. This strategic planning dramatically simplifies your entertaining efforts, allowing you to be present and enjoy the festivities without being tied to the kitchen.
If you’re someone who appreciates recipes that evoke a sense of nostalgia while still feeling fresh and cleverly inventive, this Deviled Pickles dish is precisely what you’ve been searching for. It embodies the essence of simple home cooking, elevated with a delightful and unexpected twist that will charm everyone at your table.
Perfect Serving Suggestions for Your Deviled Pickles
These versatile pickle appetizers are a fantastic addition to almost any party food spread. Their unique combination of salty, tangy, and creamy flavors makes them particularly well-suited for platters that feature a variety of crunchy, savory, and fresh items, offering a refreshing contrast and exciting taste dimension.
Consider serving your Deviled Pickles in these delightful ways:
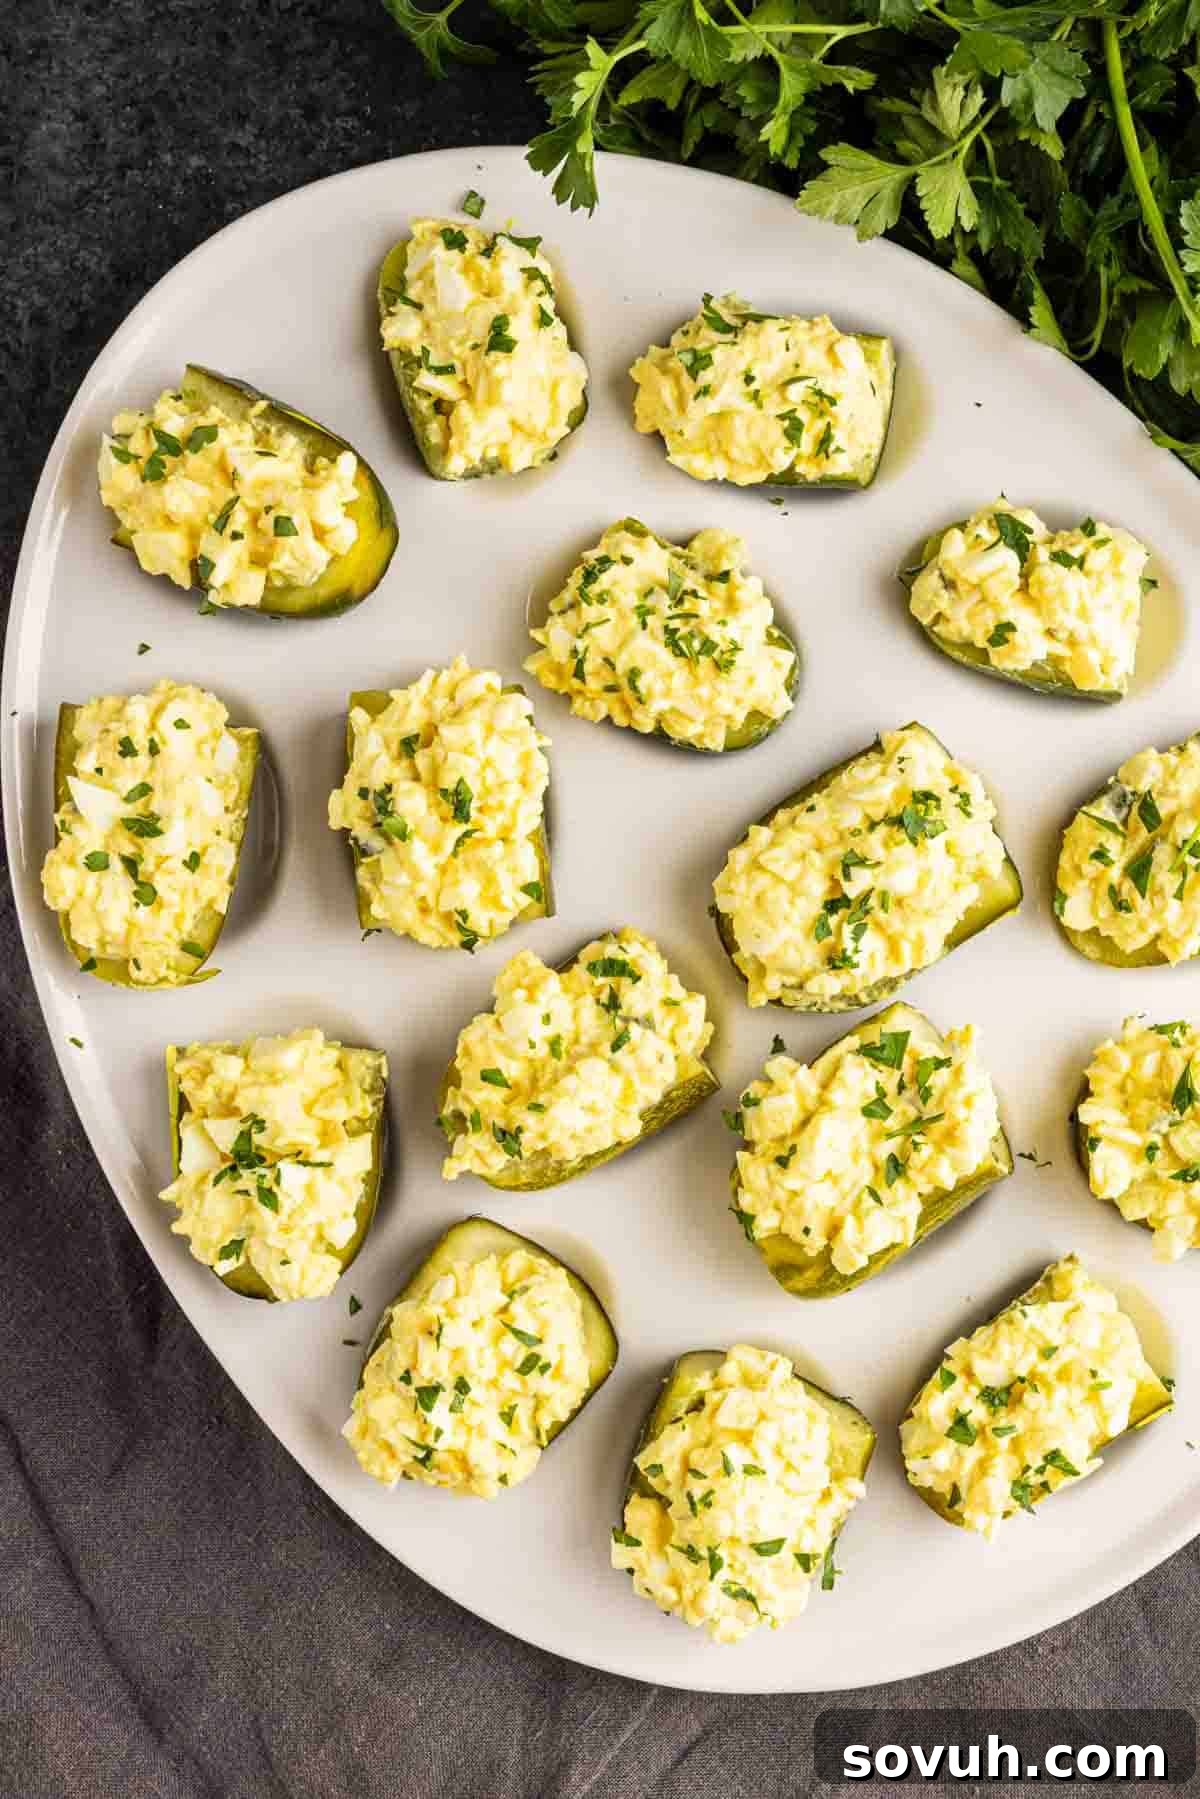
- Arranged elegantly on a chilled platter, perhaps with an extra sprinkle of fresh chives and paprika for a visually stunning presentation.
- As a standout component of a vibrant game day snack board, alongside other crowd-pleasing bites like sliders and wings.
- Paired with hearty dishes such as sliders, spicy chicken wings, and an array of flavorful dips for a relaxed and casual party meal.
- Alongside crisp veggie trays and rich cheese boards, where their tangy profile can provide a welcome counterpoint to richer flavors.
- As a charming and unexpected Easter or spring brunch appetizer, adding a fresh, zesty element to your holiday spread.
- An ideal companion to classic barbecue dishes at summer cookouts, complementing smoky flavors with their refreshing tang.
- As a low-fuss, high-impact finger food for festive holiday gatherings, offering an easy yet sophisticated option for guests.
They also complement other delicious bite-sized appetizers beautifully, including Southern Deviled Eggs, exploring a wider selection from 10+ Deviled Egg Recipes You Have to Try, or browsing through 100+ Bite Size Appetizers for Parties for more inspiration.
Storage & Reheating Guidelines for Deviled Pickles
Given that this recipe features hard-boiled eggs and mayonnaise, it’s imperative to treat Deviled Pickles as a refrigerated appetizer to maintain food safety and quality.
To store any leftover Deviled Pickles, place them in an airtight container and keep them in the refrigerator. For the best quality, flavor, and texture, aim to consume them within 2 to 3 days of preparation. As a general food-safety guideline from the USDA, hard-cooked eggs should ideally be used within 1 week of cooking, and prepared leftovers containing them are typically best refrigerated for 3 to 4 days.
Perishable foods, including these deviled pickles, should never be left out at room temperature for more than 2 hours. If the ambient temperature is above 90°F (32°C), this safe window shrinks to just 1 hour. If your Deviled Pickles have been sitting out at a party beyond these recommended times, it is always safer to discard them rather than refrigerate them again, to prevent any risk of foodborne illness.
For maintaining the best possible texture, especially if you plan to make them ahead:
- If making in advance, consider storing the creamy egg filling and the hollowed-out pickle halves separately. This helps prevent the pickles from softening and keeps the filling fresh.
- Always pat the pickle halves thoroughly dry before you fill them. This step is crucial to prevent the filling from becoming watery and to ensure the pickles retain their crispness.
- For maximum crunch and freshness, assemble the Deviled Pickles as close to serving time as possible. This allows the pickle to maintain its firm texture, providing a delightful contrast to the soft filling.
Freezing Deviled Pickles is not recommended. Both the hard-boiled eggs and the mayonnaise-based filling will undergo undesirable textural changes upon thawing, becoming rubbery or separating. Additionally, the pickles themselves will lose their characteristic crispness and become soft and unappetizing once thawed.
Like this delightful recipe?
Make sure to follow us on Instagram and Pinterest for more easy and delicious recipes like this!
Deviled Pickles Recipe
Servings: 16
Prep Time: 30 minutes
Total Time: 30 minutes
Created By: Kat Jeter & Melinda Machado
Summary: Deviled Pickles are a creamy, tangy pickle appetizer made with eggs, mayo, mustard, and dill pickle for an easy party bite that’s sure to be a crowd-pleaser.
Ingredients
- 6 Hard-boiled eggs, peeled
- 1.5 tablespoons Mayonnaise
- 1/4 cup Finely chopped dill pickle (from the scooped-out centers)
- 2 tablespoons Mustard (yellow or Dijon, to taste)
- Pinch of Salt (adjust to taste)
- 8 Whole Dill Pickles (firm and crisp)
- Optional: Paprika for garnish
- Optional: Fresh Chives, finely chopped, for garnish
Instructions
- Slice your whole pickles in half lengthwise. Using a spoon, gently scrape out the inside of each pickle half, creating a well for the filling. Cut each long pickle half into two shorter pieces for bite-sized portions.
- Finely chop the pickle insides that you removed and set them aside.
- Finely chop the peeled hard-boiled eggs and place them in a small bowl.
- In the bowl with the eggs, add the mayonnaise, finely chopped dill pickle, mustard, and a pinch of salt. Mash and stir everything together with a spoon or fork until well combined and creamy.
- Spoon the egg mixture generously into each hollowed-out pickle half.
- If desired, sprinkle the tops of the filling with a tiny bit of sweet paprika and/or chopped fresh chives before serving.
Nutrition Information (Estimated Per Serving)
Calories: 43kcal, Carbohydrates: 1g, Protein: 3g, Fat: 3g, Saturated Fat: 1g, Polyunsaturated Fat: 1g, Monounsaturated Fat: 1g, Trans Fat: 0.003g, Cholesterol: 70mg, Sodium: 333mg, Potassium: 66mg, Fiber: 0.4g, Sugar: 1g, Vitamin A: 163IU, Vitamin C: 1mg, Calcium: 29mg, Iron: 0.3mg
Nutrition Disclaimer: We are not certified nutritionists. Nutrition facts are an estimate and are provided as a courtesy. They are generated by an online API which recognizes ingredient names and amounts and makes calculations based on the serving size. Results may vary.
Course: Appetizer
Cuisine: American
