French Bread, a straightforward version
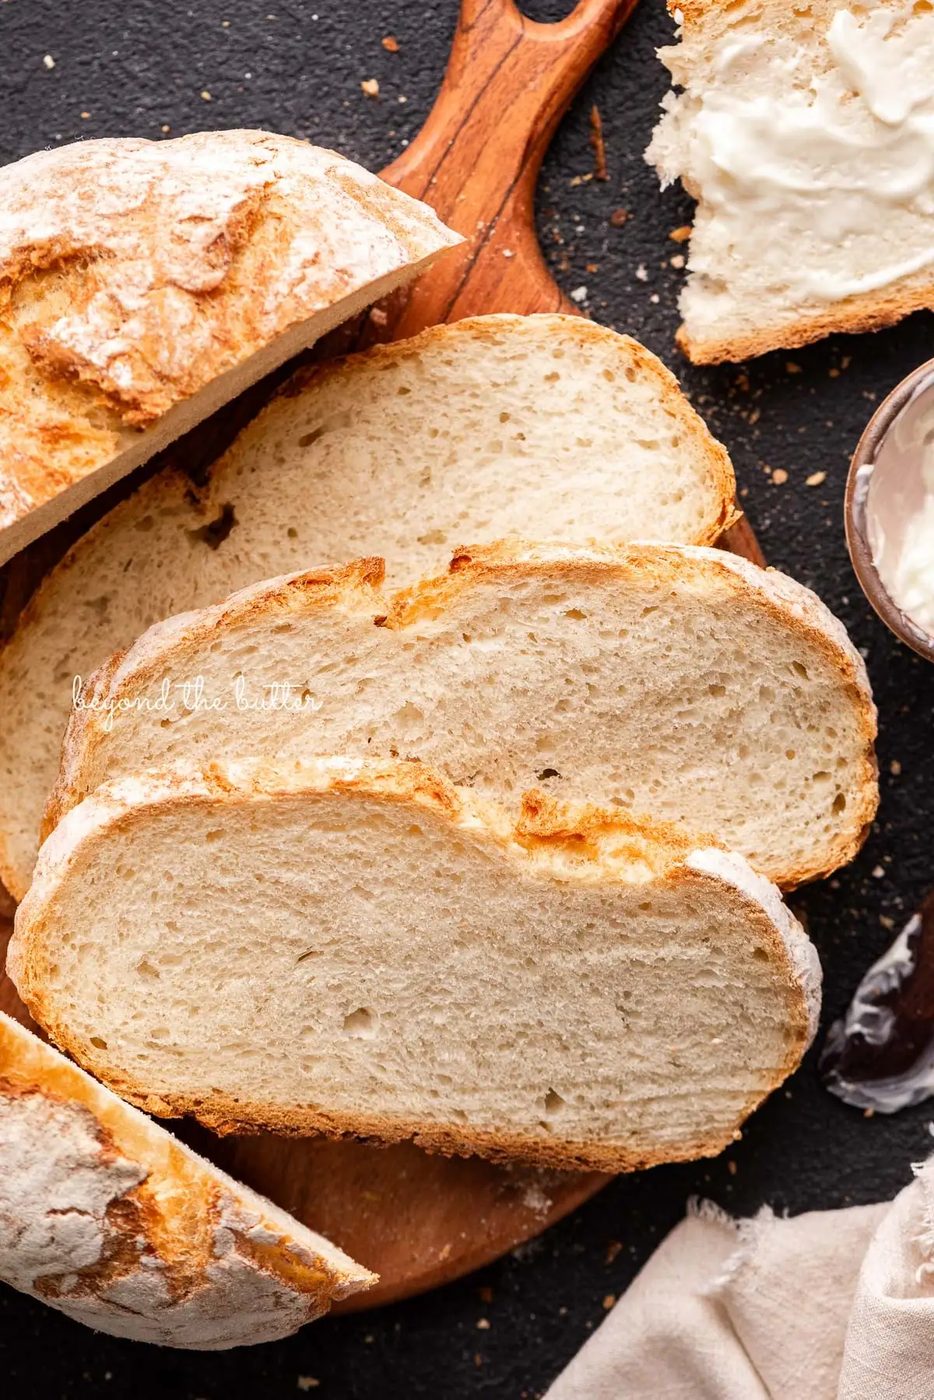
A golden-brown, crispy outer exterior with a soft, airy inside that's baked to perfection in a dutch oven — that is what these Easy French Bread deliver. It's unfussy to make, especially tasty, and pairs cleanly with your favorite butter, dipping oil, sandwich filling, and much more!
This Easy French Bread recipe post is sponsored by Ankarsrum. Thank you for supporting the brands that help make Sovuh possible!
I'm a big-time lover of bread, and with World Bread Day approaching, I thought it would be fun to share a truly easy french bread recipe with you that, like my Honey Butter Dinner Rolls, Easy House-made Bagels, and House-made Soft Pretzels, are made up of simple pantry ingredients you probably already have in your kitchen!
It's an easy recipe to prep, thanks to my Ankarsrum Assistent Original Mixer, their baking accessories, and bowl cover; it has two rise times (one hour for the first rise and 30 minutes for the second rise), requires a few minutes of shaping the dough, and is baked in a preheated dutch oven.
This familiar french bread smells and tastes wonderful, elevates any meal, or stands cleanly on its own!
Ingredients
The ingredients shown in the image below are used to make this easy french bread recipe. Items noted in the bulleted list are key ingredients that needed a bit more explanation.
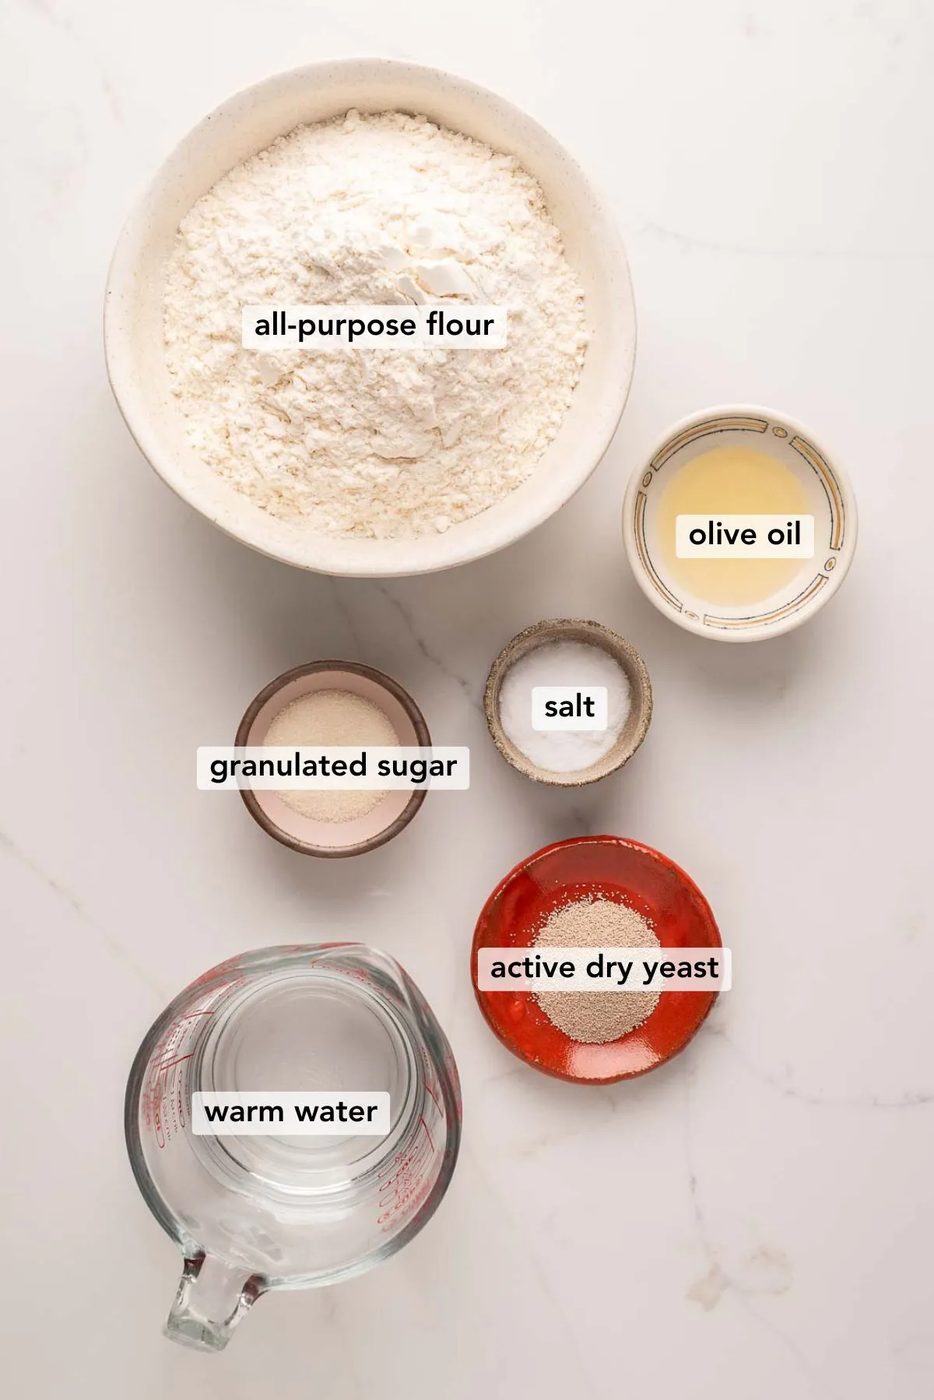
- All Purpose Flour. I used King Arthur's brand of all purpose flour, but use what you have on hand. You can also use bread flour as a 1:1 substitute.
- Active Dry Yeast. You can use the kind in a jar or a single packet of active dry yeast containing about 2 1/4 teaspoons, the same amount needed for this method. You can also use instant yeast as a substitute (rise times will be a bit shorter).
- Warm Water. By warm water, we mean warm to the touch. Not cool, not hot. If using a digital thermometer, aim for 80ºF-110ºF.
- Granulated Sugar. You can also use honey as a 1:1 substitute for granulated sugar.
For quantities and instructions, please see the method card below.
Instructions
Below is a brief overview of how to make this easy french bread. Visit the method card below for the full printable recipe, which can be made using US customary or metric measurements.
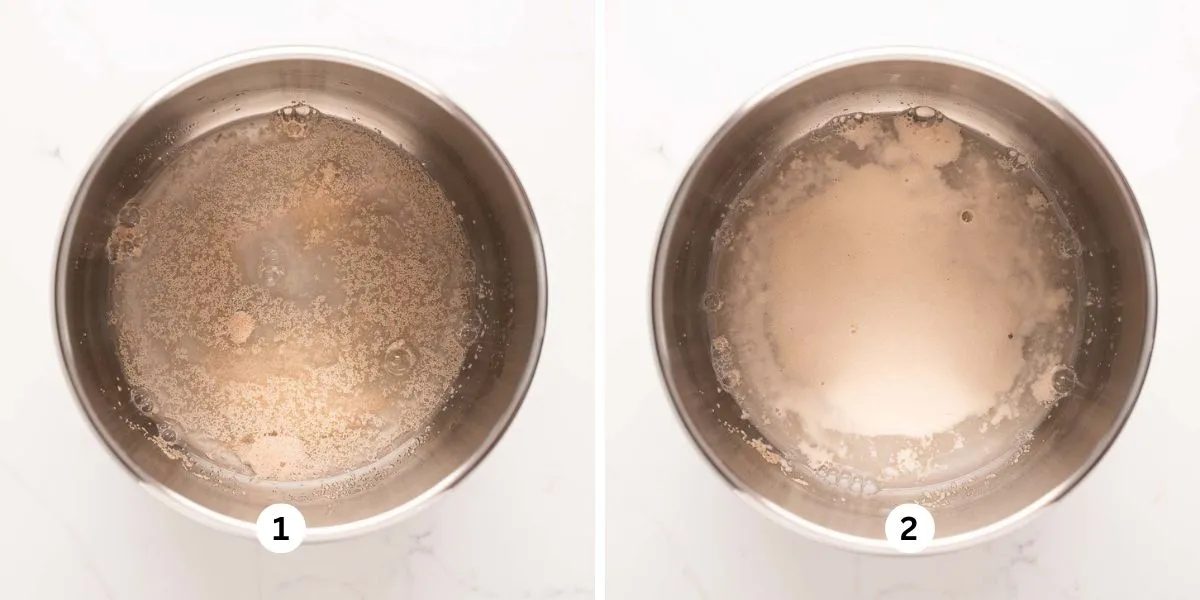
Step 1. Proof the active dry yeast mixture. Add the yeast, sugar, and warm water to the bowl of your Ankarsrum mixer or mixing bowl if mixing by hand (Image 1). Give it a quick whisk, then cover it with the mixing bowl cover (or use a clean tea towel). Let the mixture sit for 5 minutes to let it proof. The top of the mixture should be foamy when ready (Image 2).
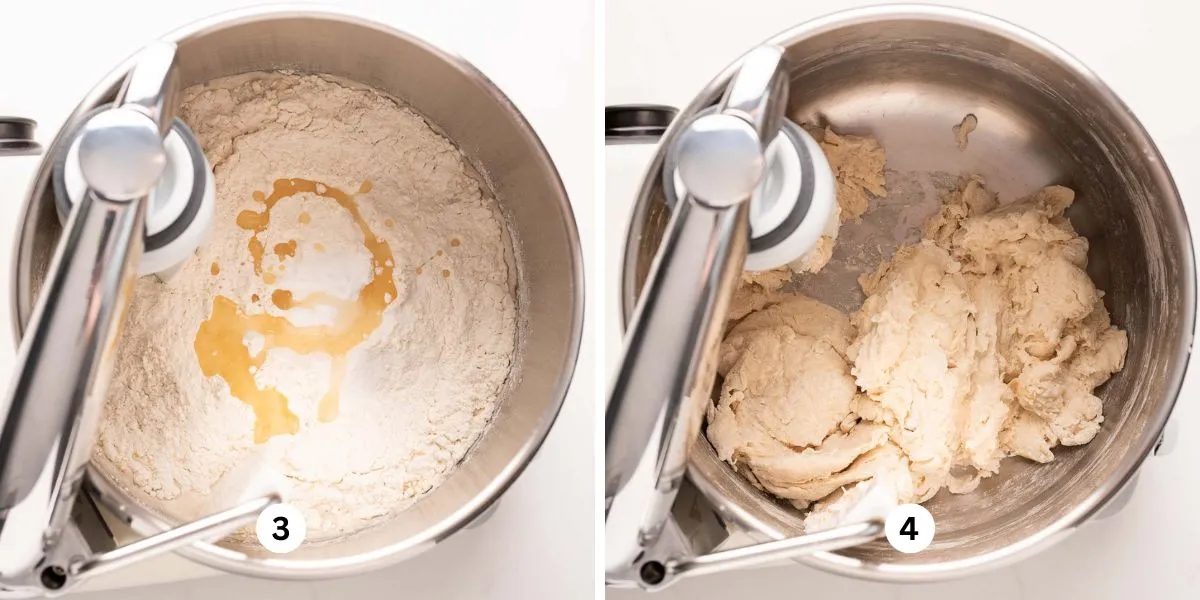
Step 2. Add in the remaining ingredients. This includes all-purpose flour, olive oil, and salt (Image 3). Mix on medium speed using your dough roller and dough knife attachments (or dough whisk if mixing by hand) until the flour has been fully incorporated into the dough (Image 4). The dough will be a little wet and sticky to the touch and shaggy in appearance.
Quick Tip: If the dough is still pretty wet and super sticky (using 3 cups), add 1/4 cup (36g) of all-purpose flour. You can add another 1/4 cup to the dough if needed, but I wouldn't add any more than this. The dough is supposed to be a little wet and sticky. During my testing, I ended up using 3 1/4 cups.
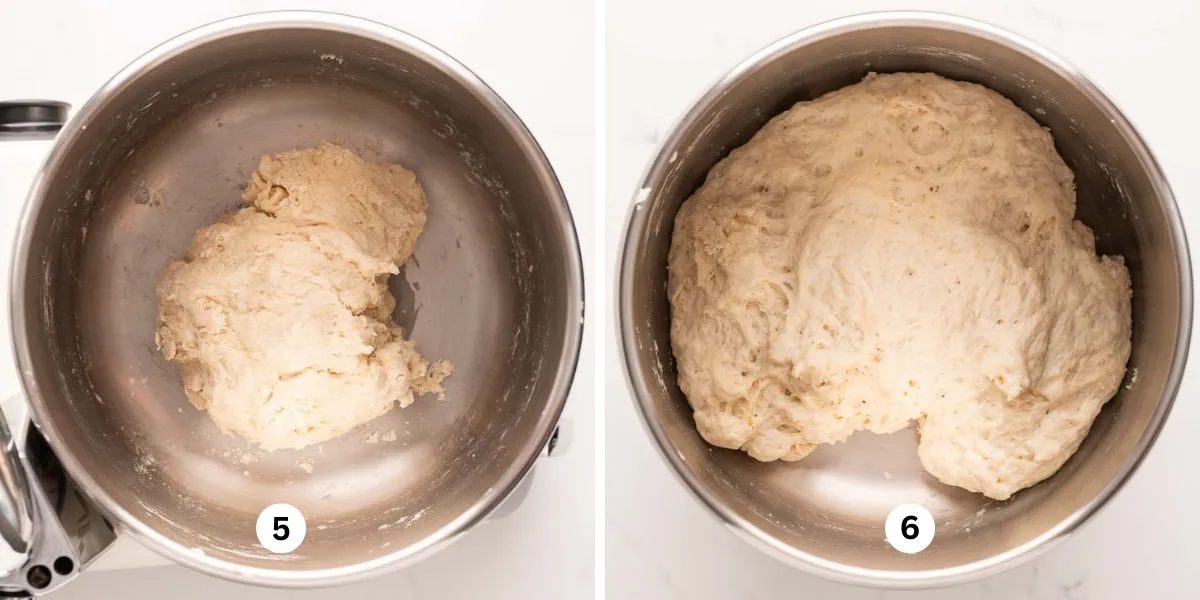
Step 3. Cover and let the dough rise. Leave the dough in the mixing bowl and cover with either the Ankarsrum mixing bowl cover or a clean tea towel. Place in a warm spot in your kitchen and let it rise for 1 hour or until it's doubled in size (Images 5 and 6). Do not punch the dough down. Instead, invert the bowl and let the dough turn onto a clean, lightly floured surface. Use your spatula attachment or regular spatula if you have any dough stuck to the bottom of the bowl.
Quick Tip: If you want to dust the inside of the stainless steel mixing bowl with a little flour to prevent the dough from sticking later, you can, but it's not necessary.
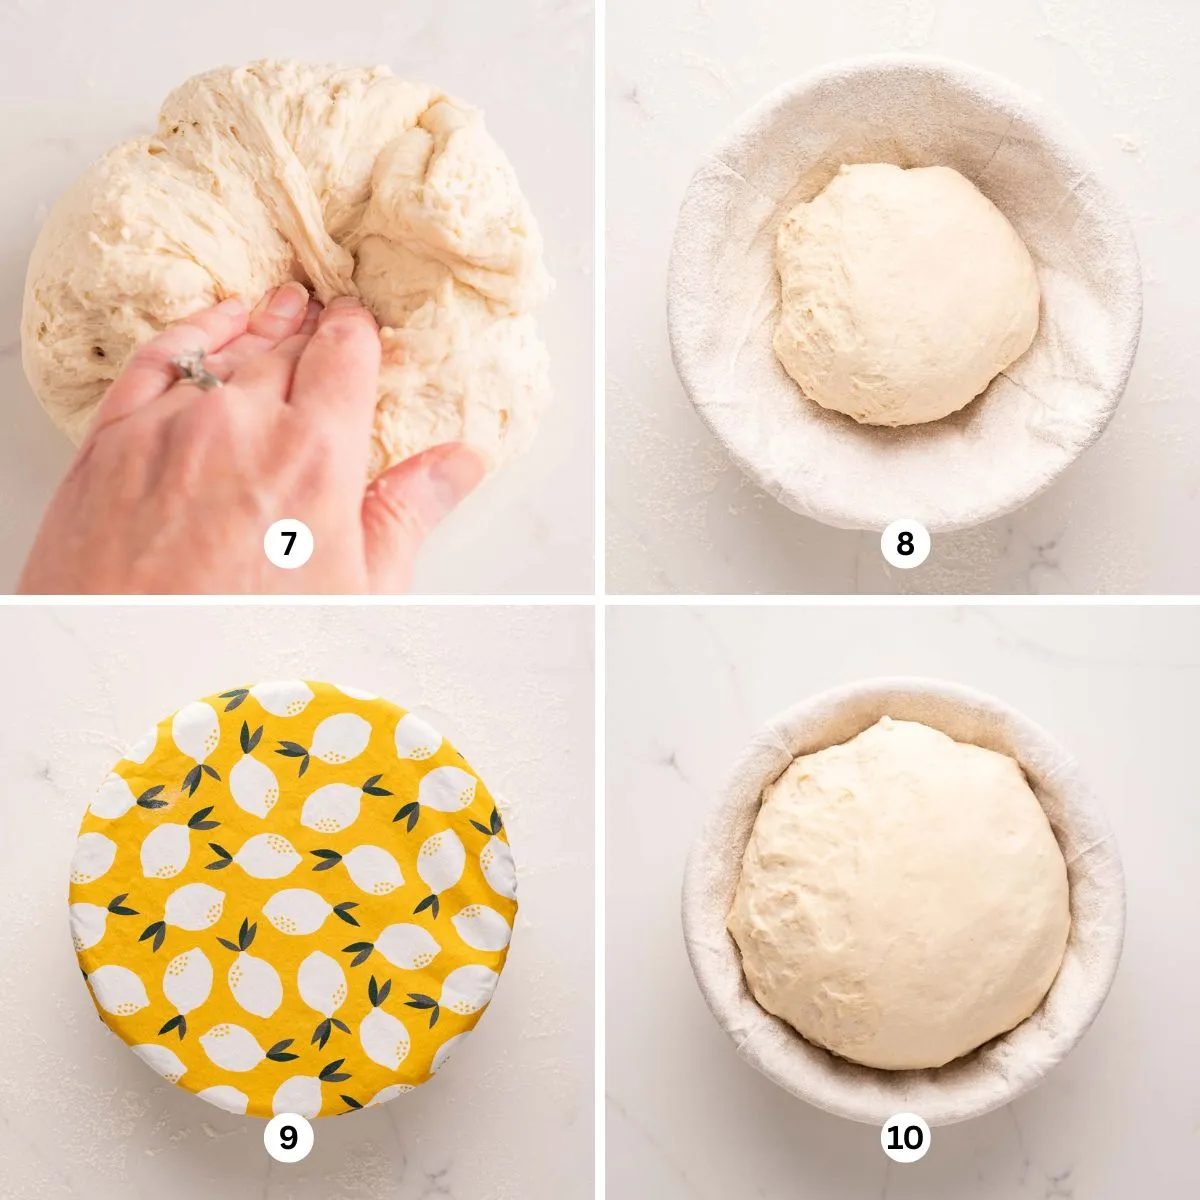
Step 4. Shape and let the dough rise once more. Gently shape the dough by pulling up on a corner of the dough and then folding it into the center. Repeat this several times until the dough no longer wants to stretch (Image 7). Place the dough into a well-floured banneton bread proofing basket (or you can use a mixing bowl), seam side down with the smooth top visibly showing (Image 8). Cover with a fabric bread bowl cover or a clean tea towel, letting it rise for another 30 minutes until it's doubled in size (Images 9 and 10).
Quick Tip: While your french bread dough is going through the second rise, preheat your oven to 425ºF with your dutch oven (lid on) placed on the center rack. I also highly recommend preheating a sheet pan or cookie sheet placed directly underneath the dutch oven to avoid your bread loaf getting a burnt bottom.
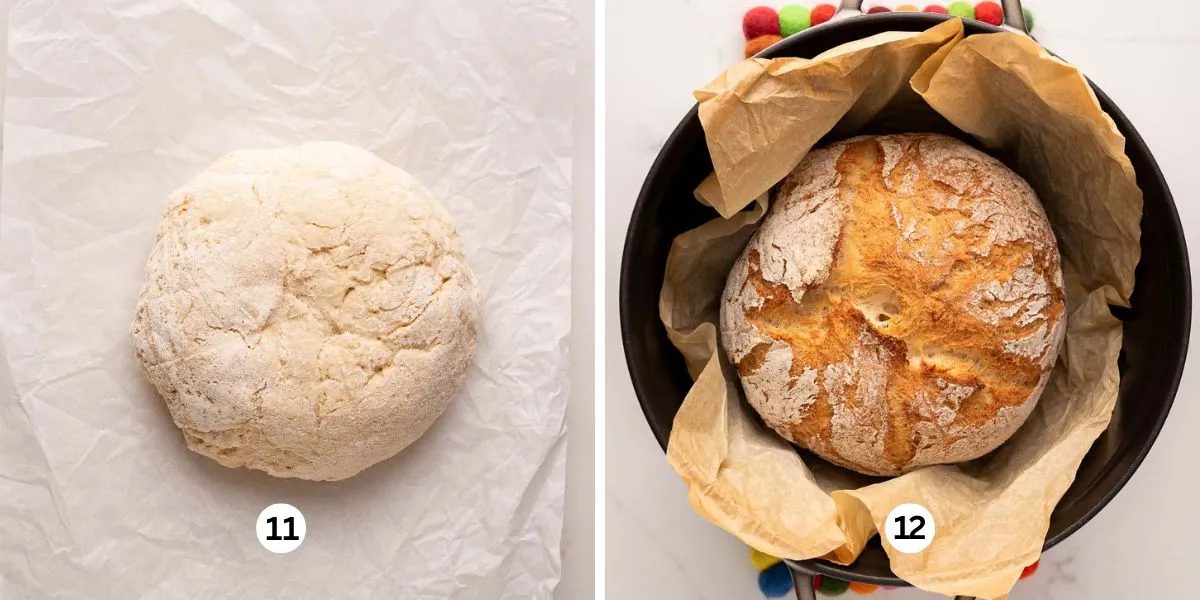
Step 5. Invert the dough onto parchment paper and bake. Once your french bread dough has doubled in size, invert it onto the center of a crumpled sheet of parchment paper so the seam side is now facing up. This is so you get that cleanly cracked top (Image 11). Very carefully place the bread with the parchment paper sling into the preheated dutch oven. Put the lid back on, then bake for 30 minutes at 425ºF. Your bread should be a light golden brown color at this point. After 30 minutes, remove the lid and bake the bread for another 15 minutes more (Image 12).
Quick Tip: If you choose not to place a baking sheet underneath your dutch oven, you'll want to reduce your second baking time (sans lid) to 10 minutes.
Step 6. Carefully remove the bread and allow it to cool. The parchment paper sling will be slightly brittle, so handle it gently. You can use tongs or oven mitts to grab the parchment paper to transfer the bread onto a cooling rack. Slide the parchment paper from out under the bread and discard. The bread will take 1-2 hours to cool down to room temperature. You may even hear it crackling for a few minutes after you place it onto the cooling rack—this is good!
And while it may be tempting to slice it right then and there, it's best to wait until the bread has completely cooled to room temperature.
Storage
- You can store your bread at room temperature in a paper or plastic bag for 3-4 days. With the plastic bag, remove as much air from the bag as possible before sealing.
- If storing in a paper bag and you've already sliced your bread, it's best to store it cut side down inside the bag. This helps to keep the open side soft.
- Unless you live in a humid climate, avoid storing your bread in the refrigerator because it can make your bread stale faster. Instead, freeze your bread. Slice it, wrap it in plastic wrap, then place it in a well-sealed freezer bag. When you need a slice or two, allow it to thaw at room temperature, then toast or bake. Bread stored in the freezer can last up to 3 months.
Questions on this bake
Can Use instant yeast instead of active dry yeast?Yes. Your rise times will be a little shorter.
Can Use bread flour instead of all-purpose flour to make this french bread?Yes. It will be a 1:1 substitution.
What size dutch oven should Use?Try using a 5-6 quart size dutch oven. Mine is a 5.5-quart size from Staub.
Can you freeze french bread?Yes, but Try slicing it first (after it's cooled) before wrapping it in plastic wrap and storing it in a freezer bag. This way, you can easily grab individual slices if you need them. Frozen bread can last up to 3 months.
- Yield 8 servings
- Prep 1 hour 35 minutes
- Cook 30 minutes
- Total 2 hours 20 minutes
- Calories 195
Ingredients
- 2 1/4 tsp Active Dry Yeast
- 1 tbsp Granulated Sugar
- 1 1/4 cup Warm Water
- 1 1/2 tsp Salt
- 1 tbsp Olive Oil
- 3-3 1/2 cups All-Purpose Flour
Tools
- Ankarsrum Assistent Original Mixer
- 5.5 qt Dutch Oven
- Parchment Paper
- Cooling Rack
- Quarter Sheet Baking Pan, optional
- Banneton Bread Proofing Basket, or mixing bowl can be used
- Mixing Bowls, if mixing by hand
- Dough Hook, if mixing by hand
Method
- To the bowl of your Ankarsrum mixer or a separate bowl (if not using a mixer), add the active dry yeast, granulated sugar, and warm water (temp should be between 80ºF-110ºF). Give it a quick whisk, then cover it with the mixing bowl cover (or use a clean tea towel). Let the mixture sit for 5 minutes. The top of the mixture should be foamy.
- Add in 3 cups of all-purpose flour, olive oil, and salt. Mix on medium speed using your dough roller and dough knife attachments (or dough whisk if mixing by hand) until the flour has been fully incorporated into the dough. The dough will be a bit sticky to the touch and shaggy looking in appearance. If you find the dough is still quite wet and super sticky, add 1/4 cup (36g) of all-purpose flour. You can add another 1/4 cup to the dough if needed, but wouldn't add any more past this amount.
- Leave the dough in the mixing bowl and cover with either the mixing bowl cover or a clean tea towel. Place in a warm spot in your kitchen and let it rise for 1 hour or until it's doubled in size. Do NOT punch the dough down.
- Thoroughly flour a round 9-inch banneton proofing basket (or you can use a mixing bowl). Set to the side.
- Once the dough has doubled in size, invert it onto a clean, lightly floured surface (kitchen counter, wooden cutting board, etc). If you have any remaining dough stuck to the bottom of the mixing bowl, use a spatula to remove it and add it to the dough. Gently shape the dough by pulling up on a corner of the dough and then folding it into the center. Repeat this several times until the dough no longer wants to stretch.
- Place the shaped dough seam side down (the smooth side should be facing up) into the floured banneton, then cover with a fabric bread cover or a clean tea towel. Let the bread rise again for 30 minutes or until it's doubled in size.
- While the bread goes through its second rise, adjust your oven rack to the center or middle position. Place a sheet pan or cookie sheet onto the oven rack, then place the dutch oven (lid on) on top (see Notes about why I use a baking sheet). Heat the oven (with the dutch oven and baking sheet inside) to 425ºF.
- When the bread is ready, invert it onto a crumpled sheet of parchment paper. The seam side should now be facing up. Very carefully place the bread with the parchment paper sling into the preheated dutch oven. Put the lid back on, then bake for 30 minutes at 425ºF. Your bread should be a light golden brown color at this point. After 30 minutes, remove the lid and bake the bread for another 15 minutes more.
- When done, remove the dutch oven from the oven, then carefully remove the bread using the parchment paper sling. The parchment paper will be slightly brittle, so handle it gently. You can use tongs or oven mitts to grab the parchment paper to transfer the bread onto a cooling rack. Slide the parchment paper from out under the bread and discard. The bread will take 1-2 hours to cool down. It will be tempting to slice it immediately after you remove it from the oven, but it's best to wait as the bread will continue to cook as it cools down.
- Once cooled completely, slice the bread and use immediately or place it into a plastic Ziploc bag and keep it at room temperature for up to 3 days. You can also wrap the sliced bread in plastic wrap and keep it stored in a freezer bag in the freezer for up to 3 months.
Baker notes
Prep time includes proofing the yeast and rise times for the dough.
I highly recommend preheating a sheet pan or cookie sheet placed directly underneath the dutch oven to avoid your bread loaf getting a burnt bottom. Having one will absorb more of the heat instead of it going directly to the bottom of your dutch oven.
If you choose not to place a baking sheet underneath your dutch oven, you'll want to reduce your second baking time (sans lid) to 10 minutes.
Crumpling up my parchment paper is a personal preference and not at all required. I simply find it easier to place into the dutch oven along with the bread.